Recently I’ve been working on a secret (shhh) project that has to deal with two 42" LCD’s mounted on cart stands for use with multi-touch overlays. The overlays, which I don’t get until next week, have five simultaneous touch points. Think of them as giant iPhone’s. Although the iPhone doesn’t do five touches. And it’s sure not 42". And mine runs Flash. I own an iPhone so I can make that joke.
While I’ve been waiting, I’ve been building the hardware pieces as they’ve arrived. While there have been a few mix-ups most of the hardware has arrived. For the base cart, we’re using a Chief Flat PRM series cart along with a matching plate for the LCD’s. The LCD’s are Insignia 42" 1080p models, which were an emergency choice but work quite well. This combined with Lenovo Y450’s make up the bulk of the hardware.
Piecing it together I found I was missing a key piece: no mount for the laptop on the back of the cart. These carts weren’t cheap but I was out of time and didn’t have time to contact Chief. So racking my brain, I happened to recall a Lifehacker article that pointed to monitor rack hack. This was sort of the same thing. Kinda. Down to the office supply store with a tape measure, I couldn’t quite find something that would work the same for the Y450’s, which are little big (but pretty nice actually). But I came away with a similar plan using metal mesh desk document holder.
Let’s get hacking.
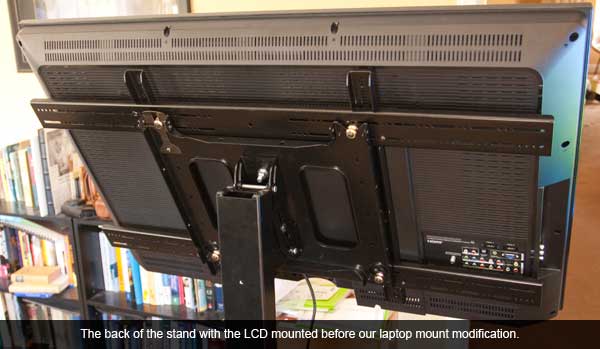
As you can see, there’s not much on the back of the mounted LCD cart. The center post is adjustable to different heights and the LCD can be pitched to a different viewing angle (the screen is set to 30 degrees in the picture). My plan was to use the center column connect where the LCD mount connects via four bolts to attach our makeshift laptop holder. I like to think of it as just another washer.
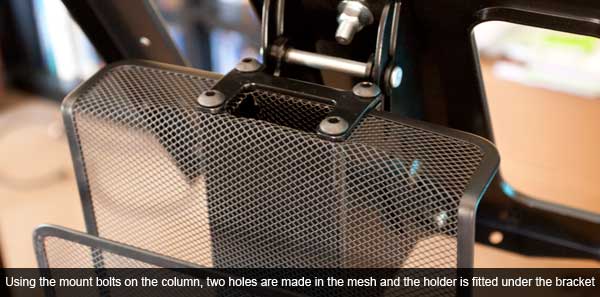
Above, you can see the plan in action. The LCD has been removed from the mount, and the bolts have been removed. I made two small holders in the metal mesh allowing the bolts to pass, and then I replace the bolts and tighten. Nothing falls down or explodes, so I continue.
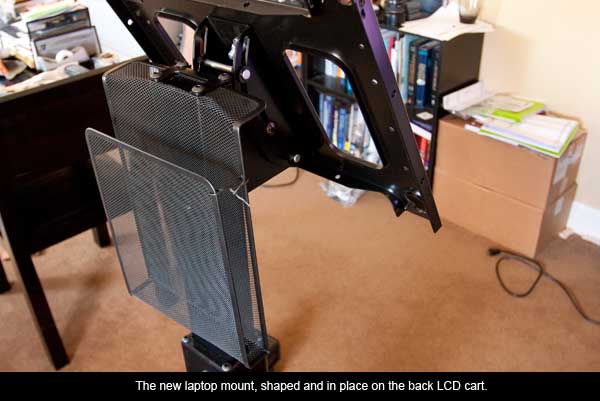
After a little additional shaping of the holder based on the size of the laptops, we have a near finished product above. Note the clever use of the wire tie to keep the mesh in shape. Those were free with the LCD’s. So they weren’t free. But still.
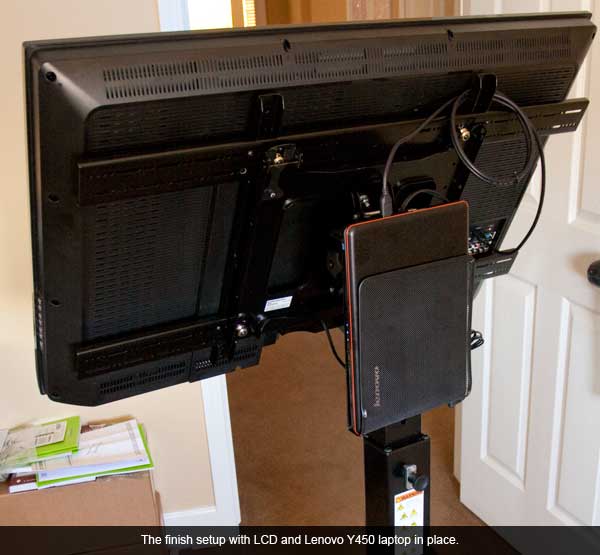
Everything now in place, the units power up, nothing explodes, and the cart remains stable. Oh so simple, but oh so effective.
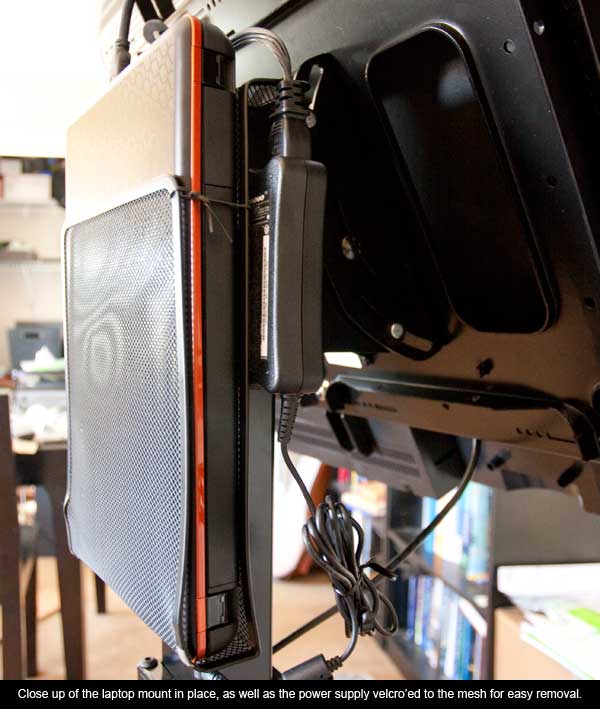
Above, you’ll see a close up of the laptop mounted in place. I used velcro to attach the power brick to the mesh so that it can be easily removed if needed. I also made a small hole in the bottom of the laptop mount through the mesh to allow the laptop power connector to well, connect. The cords all run down the center of the column for easy hiding from the users view.
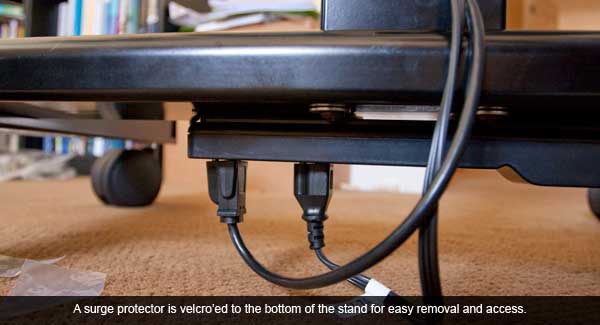
Since I had velcro, why not add a surge protector on the bottom of the cart out of view? Simple, can be removed, nothing gets fried in the case of someone trying to plug it into a 220V outlet. Unlikely, but hey, who knows?
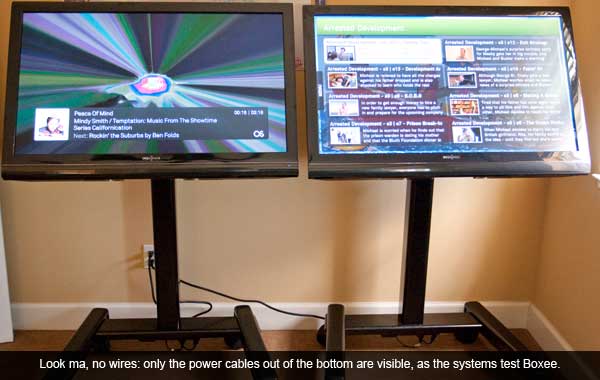
The two units, finished until the overlays get here, running Boxee. I needed to test them with something, and I figured running the alpha build on Windows XP (I downgraded the Vista installs on the laptops) would suffice for the time being.
So there you have it: creativity in a laptop mount. That did not cause destruction. Yet. ;-)