Once upon a time, my friends Gareth, Jeff and I were discussing the current trend of urban farming and the increasing amount of people keeping chickens and bees in urban settings. Many local ordinances allow this (even in larger cities) and we all found it interesting. At one point we talked about flat ship chicken coops that build easily as an interesting product idea.
Nothing came of our conversation (we have not yet gone into the flat pack chicken coop business), but the idea stuck around in my head and I talked to my wife Monica about it. We decided it might be nice to have chickens (hens, specifically) so that we’d have fresh eggs, sudo-free fertilizer for the garden, et cetera. Our local ordinance allowed for hens as long as they were cooped (or rather not free roaming the neighborhood). Next thing I know, I find two baby chicks in the house. So the adventure begins.
The Design
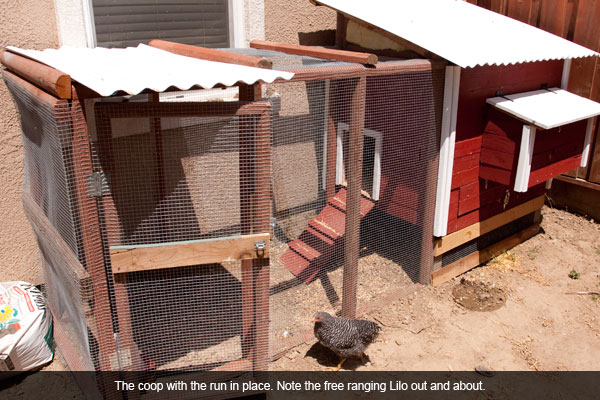
I looked into a number of different coop designs, largely based on pictures and message boards comments over at Back Yard Chickens. Our coop couldn’t be too big given both the distance requirements from the property line and the space we had available on our side yard (which barely met the property line requirement). What we settled dimension wise was:
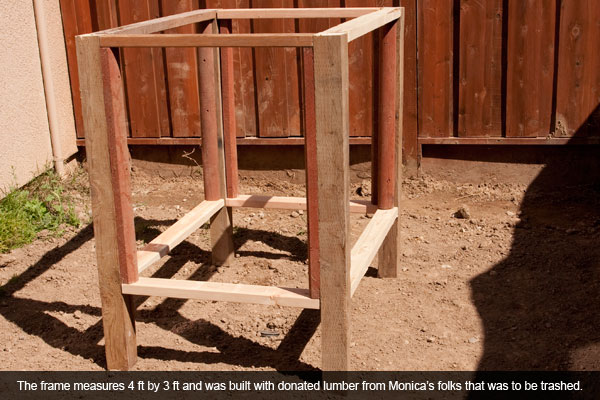
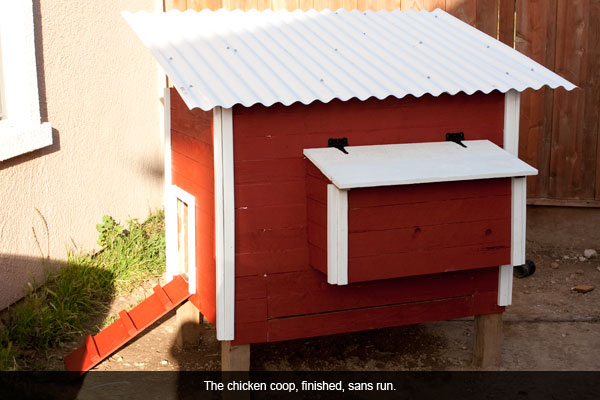
- A 4 feet long, 3 feet wide, 3 feet tall coop which sits 1 foot off the ground
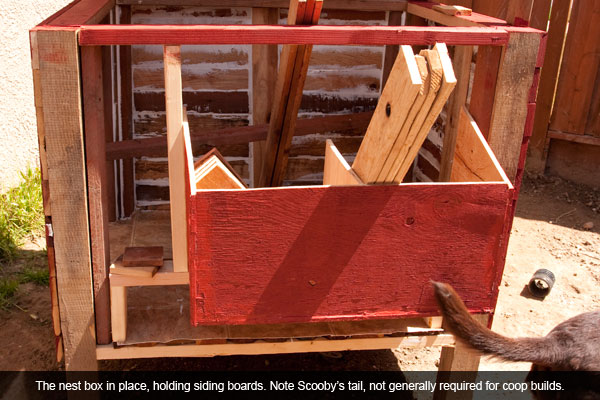
- Nesting boxes measuring 14 inches, by 14 inches, by 13 inches (which do not consume square feet from the coop)
- A 6 feet long, 3 feet wide, 4 feet tall run, with addition space under the coop (30 square feet of ground space)
From everything we read, you can get away with about 3 square feet of coop space per chicken, and since we wanted the ability to house no more than three hens (we’re starting with two mind you), we’d go with roughly 4 square feet per bird. The run would provide space for when we’re not around (we let them out during the day to roam our fenced back yard).
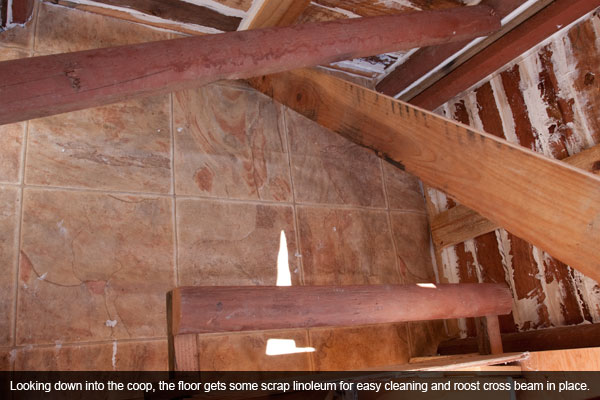
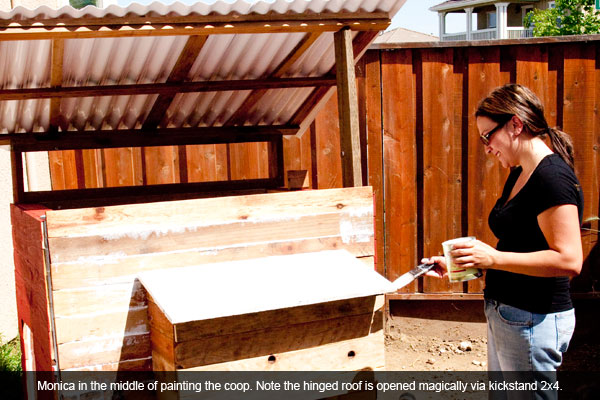
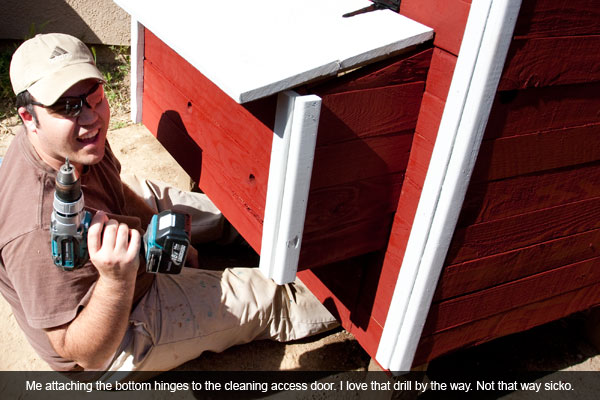
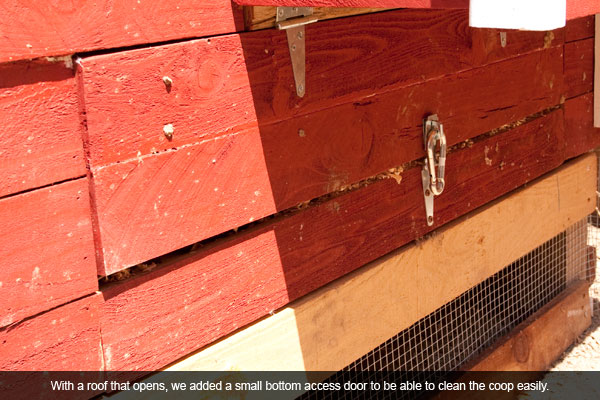
The roof would be pitched, but also be on a hinge to allow access to the inside of the coop. Due to the nesting box design and limited space, we didn’t have room (nor the materials technically, more on that later) for a larger door that most coops have. To facilitate cleaning, we put in a small access door underneath the nesting boxes which makes cleaning quite easy.
The Materials
In my original idea for the coop, I was going to try to build it using a flat pack design I’d have made. But in the end, I simply didn’t have time to do that. So, Monica and I decided to go as green as we could and started asking around to friends and family to see if anyone had any spare, old, or just plain trashed lumber that was soon to be thrown out. It just so happens, Monica’s folks did have such lumber, but it was very much an assorted lot. We liked, we thanked them, and we set out to build a coop with what we had.
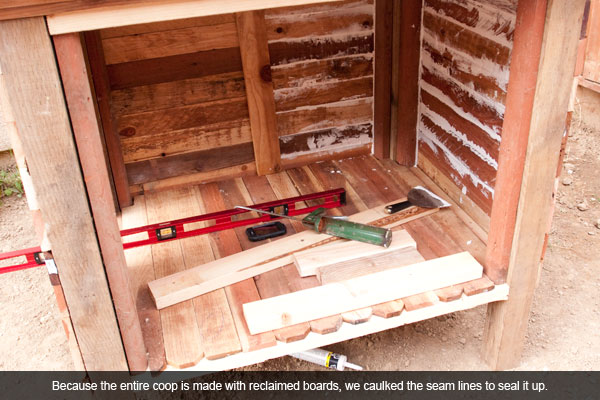
In the end, I didn’t buy a single piece of lumber or plywood for this project. The only thing I bought was the white PVC roofing material, hardware cloth, some hinges, and some caulking material.
Why the PVC roof
I should note why I used the PVC white roofing material, when I could have simply used more reclaimed boards I had. The answer is heat and weight.
I needed the roof to be easy to open, and so I wanted the weight to strike a balance. Too heavy, it’s a pain in the ass. Too light, roof might get hurt in high winds.
Where this coop is located gets a lot sun, and it will top out above 105 degrees during the middle of summer. Even now in May with temps around 75, it’s hitting close to 90 on that side of the house. The Palruf panels I bought from Home Depot run about $12 bucks a panel, but make a huge difference in temp from my limited testing sample (the coop hasn’t topped 72 yet, even on my hottest measure day of 95). How well this holds up come the 100+ days in July will be the true test, but right now, I’m happy with them.
The Build
I could explain it, but you’re probably tired of reading my rambling prose. Photographs follow.
The Finished Product
The finished coop in all it’s glory.

Final thoughts
The finished coop functions as I think it should, and the chickens have no issues using it.
The one problem we ran into was we hit some cold windy nights in April, so I had to insulate the roofing vents to keep the chill down. I had planned on devising something for this towards the fall, but California weather has been oddly cold for this time of year so insulation it was (which I already had on hard anyhow).
Otherwise, it was a fairly simple build that didn’t take a lot of time to complete. Mind you, I didn’t build all that complicated a coop either. All told we spent a couple weekends on it. It was a fun little project, to try to piece something together using odds and ends of posts, fence boards, and plywood.
Now if they’d only start laying eggs. :-)