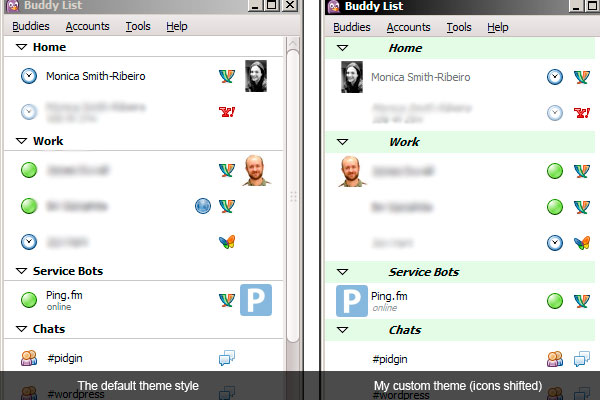
Pidgin is one of those great cross platform tools that is always on my install list when setting up a new workstation. It makes connecting to the multitude of instant messaging platforms simple, all in one nice managed application. To boot it’s open source, which not only warms my heart, but also allows me to bend it to my will should I need to.
Now, I’m not a big IM user, nor am I much into skinning or theming. However, the arrangement in the buddy list has never been to my liking. In this short example, I’ll show you the power of creating a single XML theme file that will shift your buddy icons and status fields around.

Setting up your custom theme folder
If you use Pidgin, you have a directory called .purple in either your home directory in Linux or your Application Data on Windows. Examples:
/home/{YOUR_USER}/.purple/themes
C:\Documents and Settings{YOUR_USER}\Application Data.purple\themes
To setup your custom theme, you need this set of folders underneath themes:
{THEME_NAME}\purple\blist
Example on one of my Windows machines:
C:\Documents and Settings\tmpuser\Application Data.purple\themes\justintest\purple\blist
Adding the theme.xml and editing
Inside the blist folder, you need to create your theme file, theme.xml. The Pidgin developer wiki page on buddy list themes has information as to all the settings, as well as additional examples. The following is my example in the above screenshot (basically colored group bars and buddy icon to the right).
<theme type="pidgin buddy list" name="justin-test" author="Justin Ribeiro">
<description>Justin's Test</description>
<blist color="#FFFFFF"></blist>
<selected text_color="#000000"></selected>
<groups>
<expanded text_color="#000000" font="Italic" background="#EAFCE6"></expanded>
<collapsed text_color="#000000" font="Normal" background="#EAFCE6"></collapsed>
</groups>
<buddys>
<placement status_icon="3" name="1" emblem="2" protocol_icon="4" buddy_icon="0" show_status="5"></placement>
<background color=""></background>
<contact_text font="Normal" color="#000000"></contact_text>
<online_text font="Normal" color="#000000"></online_text>
<away_text font="Normal" color="#707070"></away_text>
<offline_text font="Normal" color="#787878"></offline_text>
<idle_text font="Italic" color="#909090"></idle_text>
<message_text font="Normal" color=""></message_text>
<message_nick_said_text font="Normal" color=""></message_nick_said_text>
<status_text font="Italic" color="#969696"></status_text>
</buddys>
</theme>
The key for reshuffling the buddy icon and status icons is in the sub tag . If you look in the example above, you’ll note that I simply renumbered the attibutes to put them in the order I wanted (start at 0 all the way to the left, and then each number heads right). Simple uh?
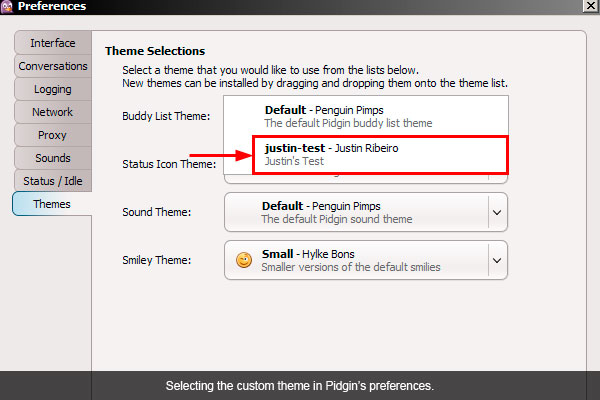
Now open the Preferences in Pidgin and select your theme as in the screenshot below. It’s that simple, really.

Conclusion
Most people I know were not aware that you could theme Pidgin beyond changing the GTK theme (some people didn’t know that either). In a land were most people change themes, maybe Pidgin works well enough that most people simply don’t care to change the themes. There are themes out there you can download and install, but you don’t find many.
Hopefully this little XML will help you not only tame and mold your buddy list to your liking, but maybe it jumpstarts your interest in theming Pidgin.