

Having been doing a lot of Google Helpouts on developing applications with Glass the most common question I get by far is:
How do I send a card to a user every day with a message of my choosing?
So, after explaining the process a lot, I decided to work through the issue with as little code as possible. The result: a new sample Glassware application for learning and sending cards to users daily called, you guess it, Glass Daily Card.
The readme in the project is pretty clear as to the setup, so I’m not going to repeat that here. However, let’s talk about what makes this application tick.
App Engine Cron, the thing you’re probably not using
Most people have heard of cron, but explaining the process of writing a script, and then editing a crontab, and then timezones…I kept getting a glossy eyed look. So I decided that App Engine’s cron might be easier to handle.
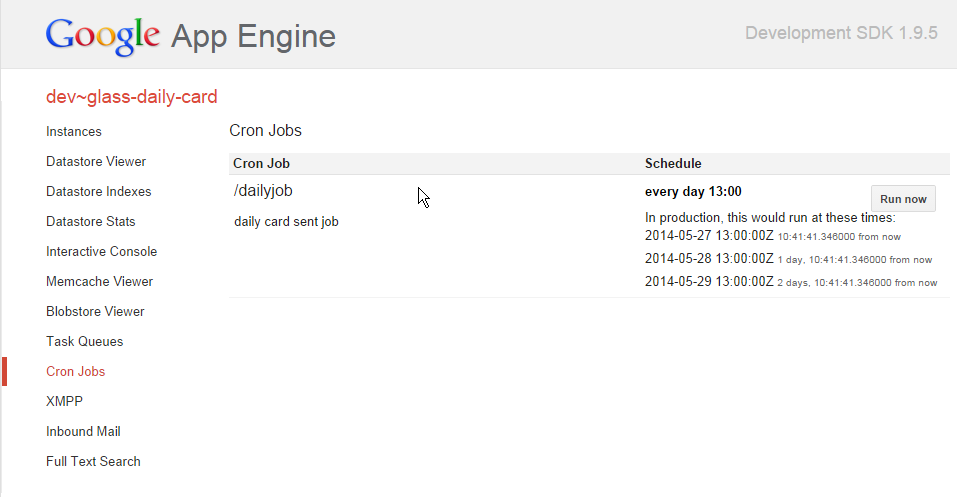
If you’ve never used cron or cron on App Engine, the sample script walks through the most basic case. There is a cron.yaml file which defines when a job or jobs is scheduled to run. That scheduled job does nothing more than point to the route that you may want to run within you app.yaml (in the sample’s case, /dailyjob).
Seems simple right? But Justin, I can’t possibly have someone just running this route anytime they want! I agree, that would be a poor design decision. Luckily, by setting “login: admin” on our route, we’re basically walling of users that don’t own or have permissions to run our app engine project. Side note: doesn’t set this to required; cron can’t handle that.
Since we don’t want to wait around (and not to mention the dev server won’t kick cron jobs locally) we can test by heading down to the cron jobs in the dev server:
Admin interface? Nah, we don’t need one.
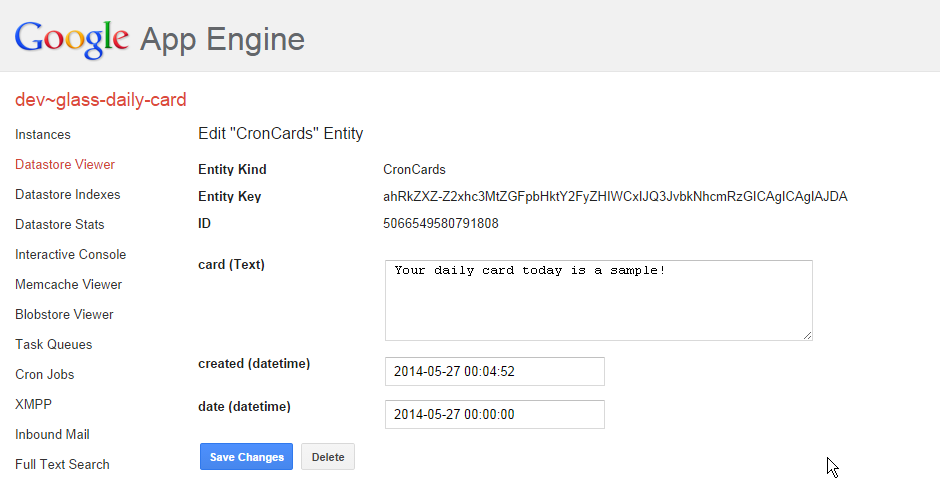
The application has no admin interface to create scheduled cards. How in the world do you do that? You use the Datastore Viewer that’s available in both the local development server and the remote, production serve in Google Developer Console. As you can see in the screenshot below, it’s pretty straight forward.
But Justin, I don’t see this mystical CronCards kind you speak of! No, probably not. First things first, you need to insert a single record to create our particular kind within the datastore. To do so, you can run the /samplesforcron route and it’ll insert a single entity record. From there, you can now see the CronCards kind in the datastore viewer and add/edit as needed.
Google+ Sign In. It’s way better.
Most of the Mirror quickstarts still use the soon to be six feet under profile.info scope (it’s deprecated and no longer supported come Septemeber). Google+ Sign In is where you need to head. My sample uses a very similar set of code as the Python Google+ Sign In Example from Google (down to the JavaScript helper which I didn’t have time to fully re-write) with a couple of tweaks to make it fit in for our use case. It will return the same auth results panel (so you can learn a little more about the hand off and return and what exactly is in there).
It’s still a sample
This is a sample. Plain and simple. I’ve commented heavily for learning purposes, but you’d need to make changes and probably expand a bit before rolling this out to production. You’d probably also want an admin panel (but I’m hoping the no admin panel will help you learn about the datastore :-).
As always, reach out to me on Google+ if you have questions or send me a pull request to make the sample a better teaching tool!