

I really like Ergotron LX monitor arms. I use them at the office for that perfect eye level on any monitor I’m having to work on. Having used them for over a decade it seems, you become reliant on that configuration and the savings it brings in the form of a stained neck when you’re working a shift at the ‘ol code mill.
At home, too many years ago to remember, I installed an LX wall mount in a tight pocket corner in a custom desk I built for Monica. I like that wall mount; easy to install, easy to use. A perfect fit for my vision of what it should do.
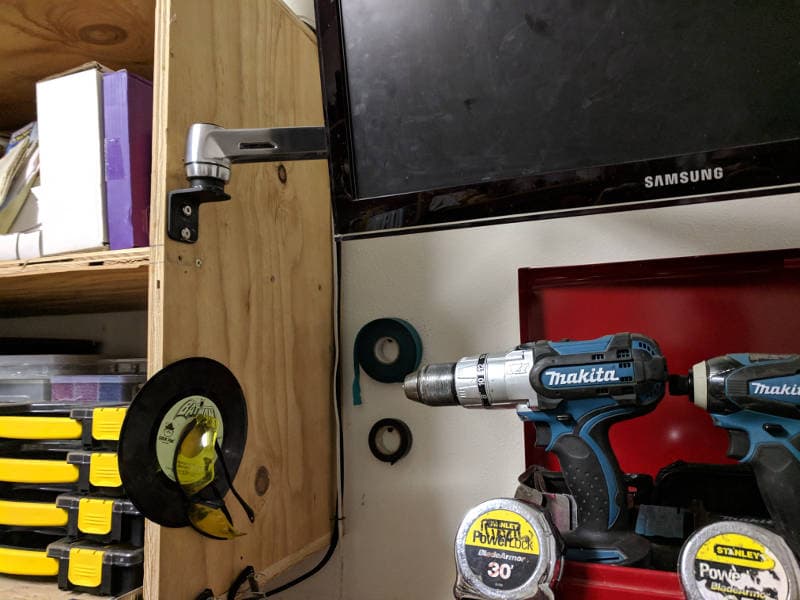
Recently I wanted more of those very wall mounts for a few different purposes. One, the twins wanted their own mini desks in their room so they can make content and what not (between the videos and the fact they’re learning to use a Launchpad Pro, it was less request and more necessity). The second, was that I wanted to mount a monitor in our workshop/darkroom in a high and out of the way location. This was mostly for my own ends when working on hardware and not wanting to clutter up my already packed workbench.
The problem is, you can’t buy said wall mount. Scratch that. You can buy them, but they come with an LX arm and as you may guessed I have no lack of LX arms. I don’t need any more. I asked, no answer. I inquired from potential vendors, and no SKU was available for just the wall mount bracket.
Undeterred, I set forth to just build some for my own purposes.
Now, building a wall mount is probably not the easiest thing to do. Attempting to do so by using as little steel as possibly was also going to be a challenge given just the physics of the matter; things are going to want to pivot.
I grabbed some spare LX desk mounts and knew I needed to chop down the OD tube into pieces so that it could be welded to some two inch angle iron (because I figured this would be the least amount of work/material required). I am not a skilled welder. So, I drove over to the finest welder I know who just happens to be my Dad, Dave. Dad taught welding and math for the Sheetmetal Worker’s Union for 30 some-odd years when he wasn’t welding or farming.
Yes, it’s ironic that I am not a skilled welder given my Dad. There is a funny story about that, but that’s for another post.
Dad of course had a better design in mind having seen said OD tube, but this was a does-not-need-to-be-fancy scenario. A few cuts and a some Heliarc welding later (GTAW for you AWS members…American Welding Society, geez it’s not all about the cloud peeps) and we had some brackets.
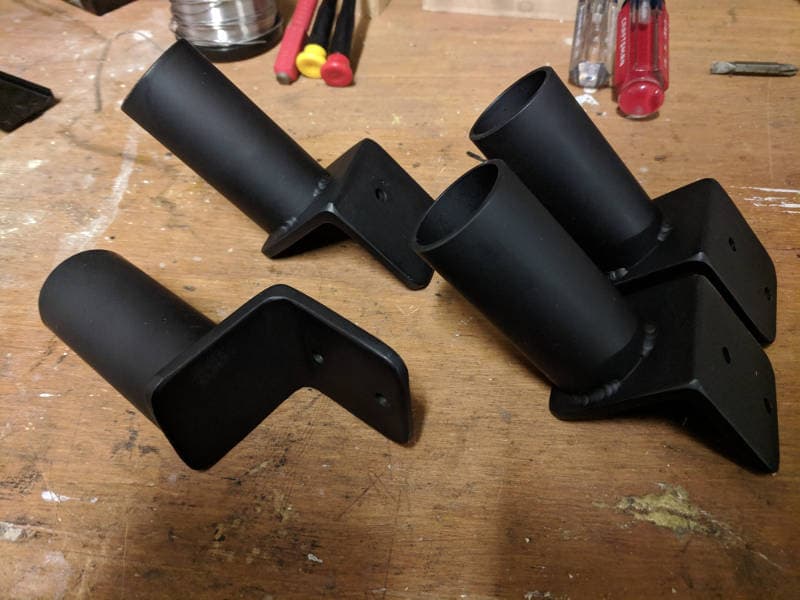
That weld. So lovely.

From there, it was just a matter of attaching onto various surfaces and seeing if the physics would not betray me. In the case of the workshop, some bolts and wide washers didn’t have any issue holding onto my cabient.
The girls room posed a challenge though. While hitting a stud wasn’t problematic, it is drywall. Steel plus drywall plus construction lag screws would generally equal a bracket shaped hole in that drywall; the drywall would just crumble. To Ergotron’s credit, their design of their wall bracket sorts this by being taller to offet that effect.
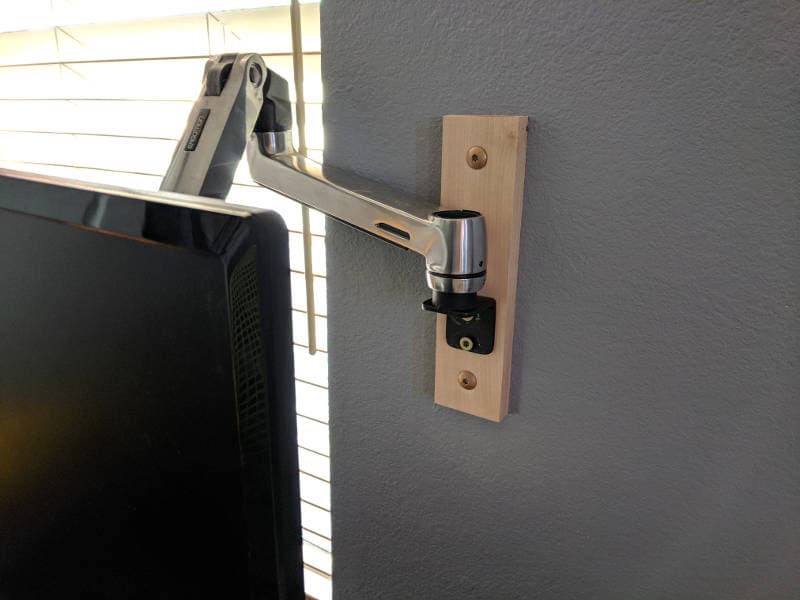
Since I wasn’t about to go steal err borrow more steel from the rack at Dad’s shop, I decided a nice hardwood would do the trick in its place. I happen to have birch in my wood rack, so a few cuts later and we have ourselves a wider mount.
In practice, these mounts seem to both take the abuse the kids are giving them (they love to swing those monitors around) and they don’t pivot nearly as much (the double-bracket design would offer less wiggle in the case of the workshop arm), but given the amount of time and lack of money required, these brackets are working out just fine.