


If it wasn’t clear by my piece for EMULSIVE or the tiny shutter button build, I very much enjoy the using the SX-70. The camera is my have-fun-at-parties walk around (before the pandemic) because it creates an instant connection; compose, snap, hand someone a photograph. Instant photography in the digital age opens people up to a world where you’re not staring at phones. The moment holds and is not encumbered by the burdens of the ephemeral—the photograph sits pinned to a car dashboard, a locker door, a refrigerator.
That said you want a quality instant photograph and that comes down two things: light and fast focusing. Light with an SX-70 is tricky. You’ve got no manual control (sans the Open SX-70 Project which I have much love for), so you’re at the behest of your feel of the scene and the people in it, the backlight that might trick the auto-exposure, the flash flooding the scene past the f/stop gear (which when closely focusing stops down and needs lots of light). The Mint Flash Bar 2 has served me well in this regard, but I longed for something more. This combined with the focus wheel and the trigger release on the right hand made for missed moments at times, which given both the expense of film and the eight-shot packs (instead of 10), and I wanted something better.
I did what I would normally do: let’s build a better SX-70 camera setup.
The Parts
Given I wanted to be able to focus and trigger release with opposite hands, so that meant I needed a grip with a shutter release cord of some type. Since I was going to use some kind of grip, I also could mount a larger and more configurable flash. Enter the Vivitar PG-1, better known as the Vivitar Pistol Grip.
These grips, circa late 1970’s and 1980’s are readily available on EBay and are not terribly expensive. I paid $15 USD for a complete handle without a shutter release which would suit my use case just fine. They are well made; the bottom camera bracket is heavy aluminum and can be detached from the grip, making it easy to work on. The handle has an existing shutter release hole, and the cold shoe for the flash rotates which is nice added bonus.
With a handle acquired, pretty much everything else came from my parts bins: a short shutter release cable, a protoboard fragment, a push button, and some 1/8 inch 6061 aluminum plate. It was time to get building.
The Custom Camera Bracket
The first thing to do was decide how I was going to mount things. Knowing I needed a mechanical-to-electronic mechanism for the shutter in conjunction with the weird weight offset of the tripod socket on the SX-70 on the PG-1 (which I did not care for), I decided I would simply cut and tap a new bracket.
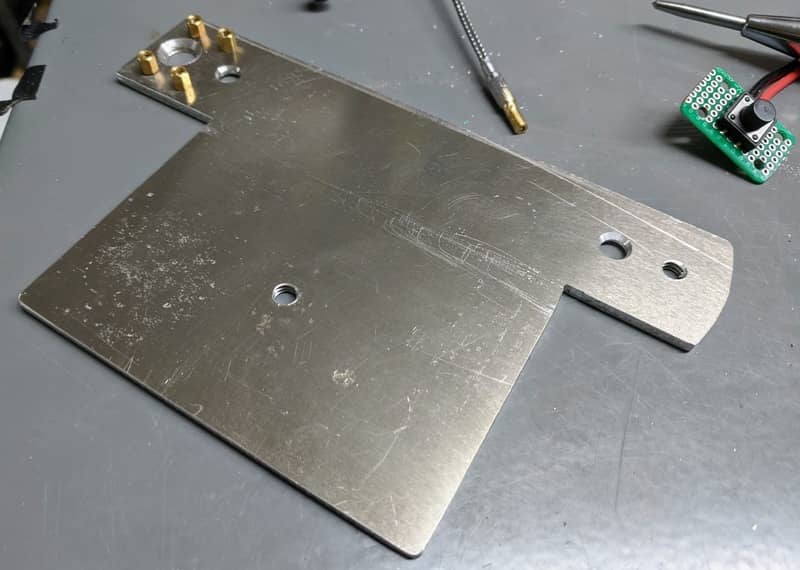
Using 1/8 inch 6061 aluminum plate, I fired up the band saw and cut a new plate with the proper shape to match the PG-1 contours. I then drilled and tapped three 1/4 inch 20 holes: one for the tripod socket line up with the SX-70, one for the existing threaded start bolt on the right (since it makes the bracket sit level on the table), and then one for the left side.
The left side bolt, to give it a very positive fit, I drilled and tapped into the PG-1 bracket directly, and countersinked the plate for a clean fit. Technically I didn’t have to do this but given the size of the camera on the plate and the need to drill two 1/4 inch holes for the shutter release wire run in the under side of the bracket, it became apparent it was going to be required.
Above the countersink, I drilled and tapped four M3 x 0.5 holes for the brass standoffs that would hold the mechanical-to-electronic mechanism for the shutter.
As plates go, it wasn’t a complicated thing to make, but I was still very happy with the build and the fact I did not break any taps in the process (the M3 tap is a pretty tiny tap).
The Shutter Release
Speaking of breaking things, while I did not break a tap in the process of building a tap, I did break my mechanical shutter release right out of the gate. For those who’ve used a shutter release of this type, you’ll note that the thread is both tapered and not M3. No, you see that’s a M3.4 28 degree thread on your shutter release, an old DIN standard.
You know what you can’t get? A tap for that. McMaster-Carr came up empty, which is truly a weird thing I don’t think I’d ever say when it comes to such a tool.
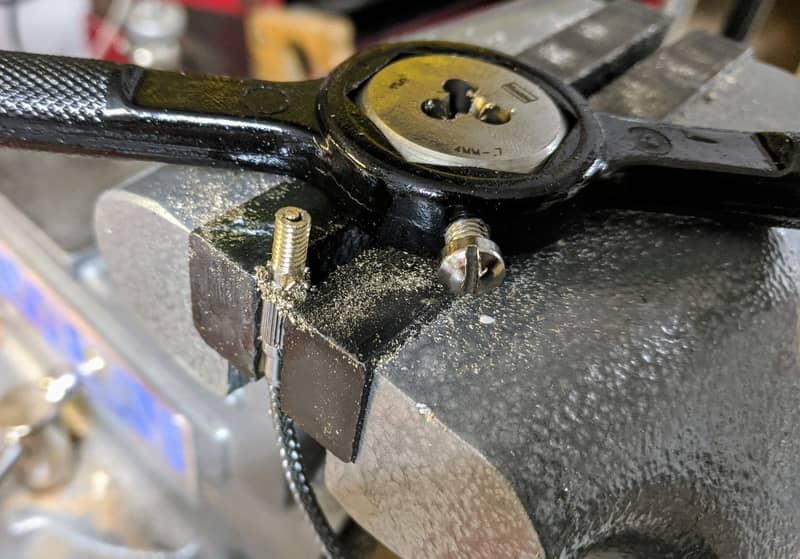
So I said to myself, surely I can grab a die and knock that down to an M3. And for a brief moment the plan was working and then one twist too many and snap! Broken.
Not to me deterred, I cut off the broken tip, grabbed a file and sanded it to within an fractions of the required diameter to run an M4 die on it. With much cutting fluid, success was had and I had a now standard M4 thread ready to roll.
With a threaded shutter release now ready, it was now simply a task of marrying that action to an electronic button. In this case, I soldered a simply push button onto a piece of protoboard I cut and sanded to shape with an underside mounted wire.
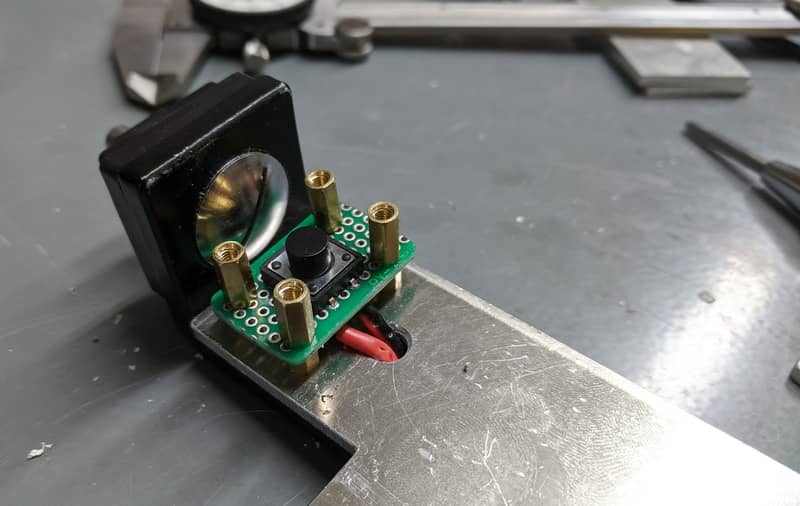
I quickly fashioned a top plate out of some aluminum and tapped an M4 hole and the alignment was just heavenly. The joys of a exact measure.
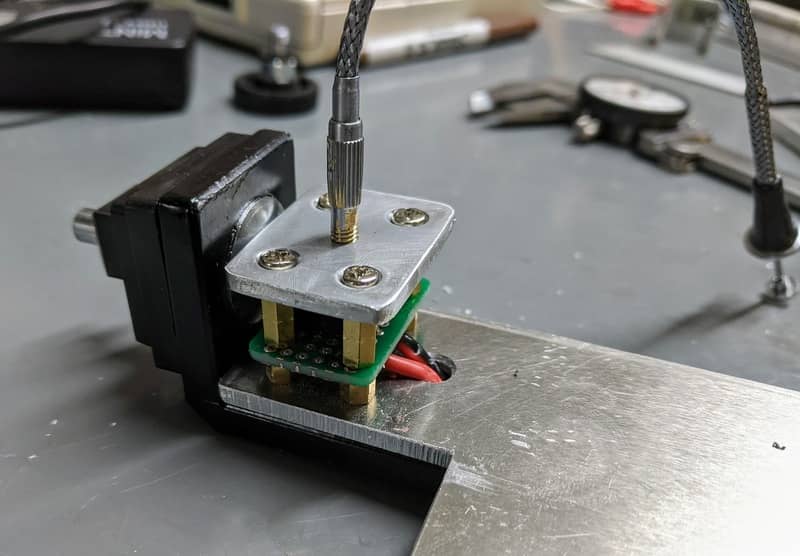
With the fit confirmed, I connected the base plate to the handle for a quick test of length and fit.
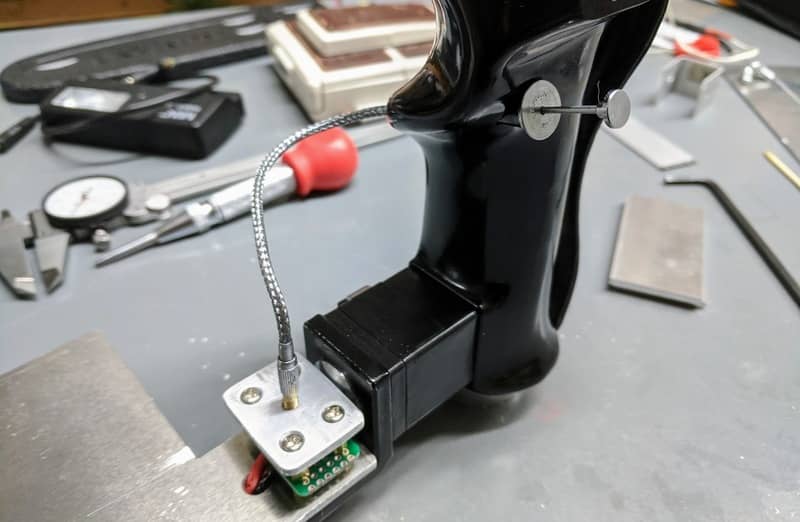
With everything in place and looking good, it was now time to test.
Flash, Camera, Action
With the camera in place, flash units connected, shutter release operational, it was now down to one simple thing: does it work?
If the following video is any indication, that’s a resounding yes.
It is hard to express how cleanly the shutter trigger operates. It’s a short throw and just fires without issue. The cycle time on the Godot TT600 flash is significantly faster than the mint flash bar, which doesn’t even have to be turned on to trigger the TT600. It’s just a buttery smooth and fun rig to use.
Now, time to shoot a whole bunch of film around the house and iron out the kinks of this new flash.